
You can add a card to the Vault during card-present and card-not-present transactions. Using either of these methods saves you a step in the process because you’re already collecting the patient's payment information.
- Add a Card on File in Vault While Taking Card-Present Payments
- Add a Card on File in Vault While Taking Payments on the Payments Screen
Add a Card on File in Vault While Taking Card-Present Payments
Interactive Walkthrough
To follow an interactive walkthrough of this process, see Add a Card to the Vault During Card-Present Transactions.
Text Instructions
- Complete the Payment Details section and other information on the Enter Card Details pop-up that appears.
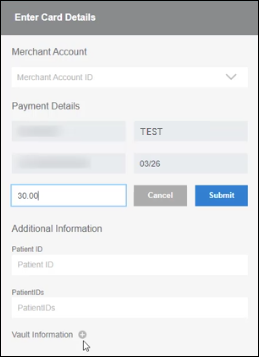
- Click the + (plus) icon next to Vault Information.
- In the Vault Information section, enter a Vault ID.
Tip: Do not use special characters or spaces in Vault ID. The only accepted characters are letters, numbers, dashes (-), and periods (.).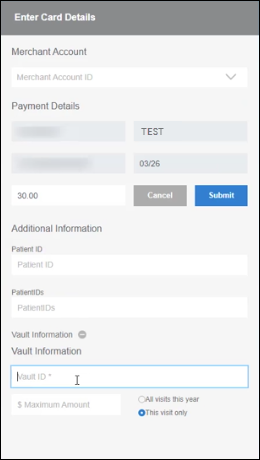
- Enter a $ Maximum Amount (the maximum amount to be charged) and choose whether the maximum amount applies to All visits this year or This visit only.
Tip: Choose All visits this year unless the card is being saved specifically for a single visit's balance. Otherwise, the PAHCF may not be valid for future visits.
Examples:- If a patient's co-pay is $30 each visit, you could set the $ Maximum Amount to $30.00 and specify All visits this year.
- If you plan to collect a post-insurance balance for a procedure, you could set the $ Maximum Amount to the post-insurance balance and specify This visit only.
- Click Submit.
- Wait for the cardholder to sign their signature on the card reader and for the receipt pop-up (Payment Accepted) and Vault Created indicator to appear.
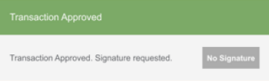
- Email or print the receipt with the Email or Print button from the receipt pop-up.
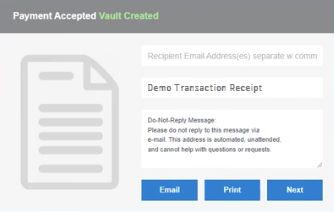
To print the receipt: Click Print > wait for the Browser Print pop-up to open > format as desired, then click Print.
To email the receipt: Enter the recipient's email address > modify the default Subject line (if desired) > if desired, add a custom message by typing your text above the default "Do-Not-Reply" message > click Email. - Click Next.
- On the Pre-Authorized Healthcare (PAHCF) screen, choose to view, print, or email the PAHCF.
To view or print the PAHCF: Click the Print button—a print preview window will appear for you to view the PAHCF or choose to Print it.
To email the PAHCF: Enter the patient's email address > add a descriptive subject for the email > if desired, add a custom message to explain that the form represents consent to use the card for future payments > click Email.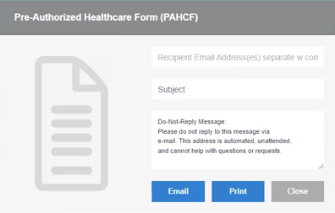
Add a Card on File in Vault While Taking Payments on the Payments Screen
Payments on the Payments screen are also called card-not-present payments.
Interactive Walkthrough
To follow an interactive walkthrough on this process, see Add a Card to the Vault While Keying In Payments on the Payments Screen.
Text Instructions
- Select Payments in the left menu.
- If your practice has multiple locations, select your location in the Merchant Account drop-down list.
- Enter the Card Number, Expiration Date, and CVV.
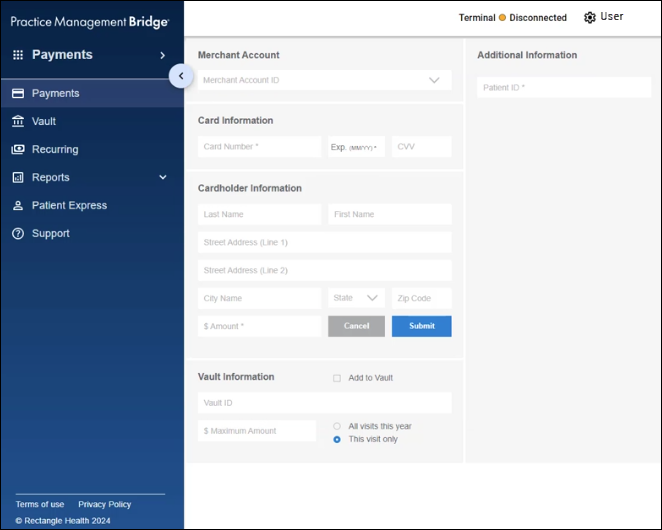
- Enter the cardholder's:
- Last Name
- First Name
- Address
- City Name
- State
- Zip Code
- Total dollars and cents amount
- Select the Add to Vault box at the bottom of the transaction details.
- Under Vault Information, enter a Vault ID.
Tip: Do not use special characters or spaces in Vault ID. The only accepted characters are letters, numbers, dashes (-), and periods (.). - Enter a $ Maximum Amount (maximum amount to be charged) and choose whether the maximum amount applies to All visits this year or This visit only.
Tip: Choose All visits this year unless the card is being saved specifically for a single visit's balance. Otherwise, the Pre-Authorized Healthcare Form (PAHCF) may not be valid for future visits.
Examples:- If a patient's co-pay is $30 each visit, you could set the $ Maximum Amount to be $30.00 and specify All visits this year.
- If you plan to collect a post-insurance balance for a procedure, you could set the $ Maximum Amount to the post insurance balance and specify This visit only.
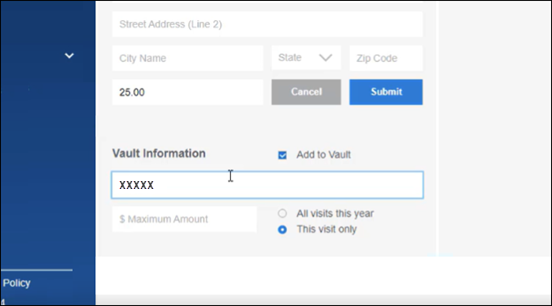
- Click Submit.
- Wait for the transaction's receipt pop-up (Payment Accepted) to appear, then the indicator that the Vault record was created (Vault Created).
- Email or print the receipt with the Email or Print button from the receipt pop-up.
To print the receipt: Click Print > wait for the Browser Print pop-up to open > format as desired, then click Print.
To email the receipt: Enter the recipient's email address > modify the default Subject line (if desired) > if desired, add a custom message by typing your text above the default "Do-Not-Reply" message > click Email. - Click Next.
- On the Pre-Authorized Healthcare (PAHCF) screen, choose to view, print, or email the PAHCF.
To view or print the PAHCF: Click the Print button—a print preview window will appear for you to view the PAHCF or choose to Print it.
To email the PAHCF: Enter the patient's email address > add a descriptive subject for the email > if desired, add a custom message to explain that the form represents consent to use the card for future payments > click Email.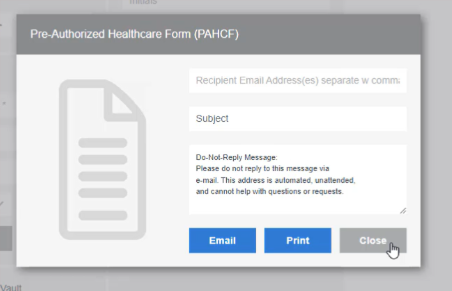
Best Practices
- For the Vault ID, use a unique identifier, like the Patient ID from your electronic medical records (EMR), to associate the card to the patient and easily find the payment method in the future.
- If a patient wants to save multiple cards, use a suffix like "-1" and "-2" at the end of each Vault ID.
- If a patient wants to add more than one card to the Vault, for example an HSA card and a credit card, you can place additional cards on file outside of a transaction.
- Because the cardholder's signature is not captured digitally when cards are added to the Vault from the Payments screen, obtain the cardholder's signature on a printed copy of the PAHCF for your records. You can print another copy of the PAHCF to do this.
Need Help?
To make it a required step for staff to place a Card on File in the Vault during every transaction:
- Use our Help Center's Chat with us button or chat icon
- Contact our Customer Care team at [email protected] or call 800-337-3630 (option 3).
Helpful?