The Vault is where you can store card information securely for future payments. Bridge™ Payments offers three ways to do this:
- Add a card to the Vault during transactions.
- Add a card directly in the Vault (outside a transaction).
- Send a Payment Authorization form via email or text for the patient to place their own card on file.
This article covers the second method: adding a card directly to the Vault outside of transactions. To see all three methods, see Three Ways to Place a Card on File in Vault.
Instructions
See Put a Card on File Without Taking a Payment to watch a video on this process.
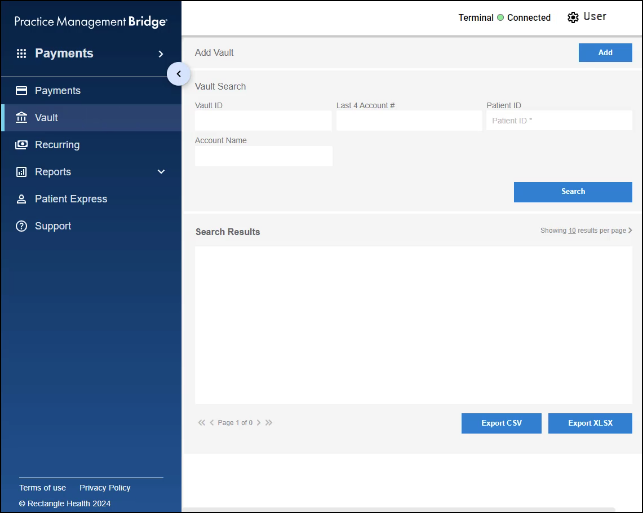
- Click Vault in the left menu.
- Click Add to create a new Vault record.
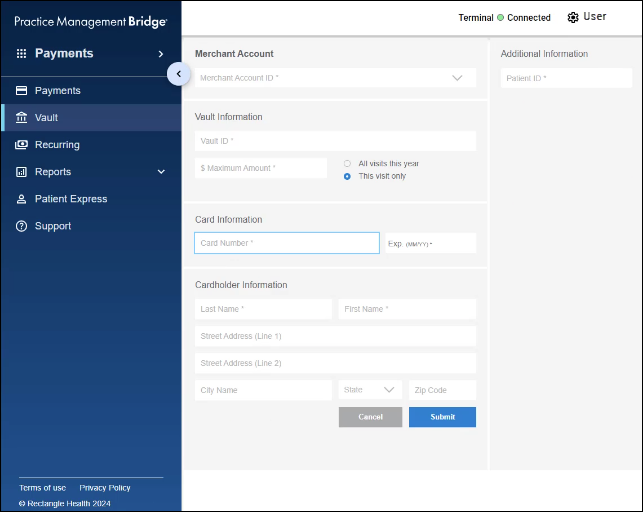
- Select your Merchant Account (if you have multiple locations) and enter a Vault ID, $ Maximum Amount (maximum amount to be charged), and choose whether the maximum amount applies to All visits this year or This visit only.
- Vault ID Information
- For the Vault ID, use a unique identifier, like the Patient ID from your electronic medical records (EMR), to associate the card to the patient and easily find the payment method in the future. If a patient wants to save multiple cards, use a suffix like "-1" and "-2" at the end of each Vault ID.
- Do not use special characters or spaces in Vault ID. The only accepted characters are letters, numbers, dashes (-), and periods (.).
- $ Maximum Amount Information
- The maximum amount you enter and the selection for "All visits this year" or "This visit only" are included on the Pre-Authorized Healthcare Form (PAHCF) that the patient signs.
- Tip: Choose All visits this year unless the card is being saved specifically for a single visit's balance. Otherwise, the PAHCF may not be valid for future visits.
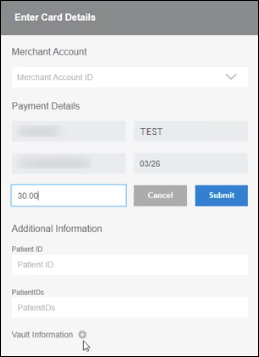
- Example: If a patient's co-pay is $30 each visit, you could set the $ Maximum Amount to $30.00 and specify All visits this year.
- Example: If you plan to collect a post-insurance balance for a procedure, you could set the $ Maximum Amount to the post-insurance balance and specify This visit only.
- Vault ID Information
- Enter the cardholder information.
- Note: Required fields are:
- Card Number
- Expiration
- First Name
- Last Name
- Note: Required fields are:
- Click Submit to prompt the cardholder for their signature.
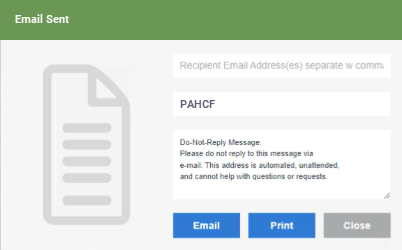
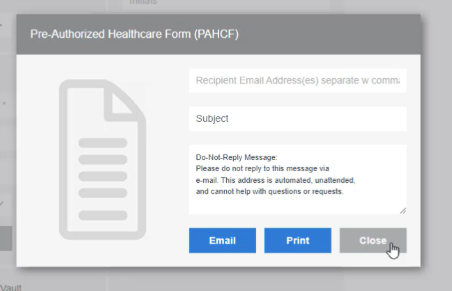
- After signing, the Pre-Authorized Healthcare Form (PAHCF) screen will appear for you to print or email the PAHCF to the cardholder.
- Note: If Bridge Payments is connected to a terminal, the cardholder is prompted to sign for the PAHCF. If a terminal is not connected, you can collect a signature on a printed PAHCF for your records.
- Note: If Bridge Payments is connected to a terminal, the cardholder is prompted to sign for the PAHCF. If a terminal is not connected, you can collect a signature on a printed PAHCF for your records.