You must have the applicable access setting assigned to issue refunds. If you do not see the option to issue refunds in Bridge Payments, contact your practice administrator.
This information only applies to the Refund and Void functions in Reports > Transaction Search. For information on blind refunds, see About Blind Refunds.
You can void payments prior to settlement and refund payments after settlement. Refunds can only be applied to the original card used.
Instructions
See Voiding and Refunding Transactions to watch a video of this process.
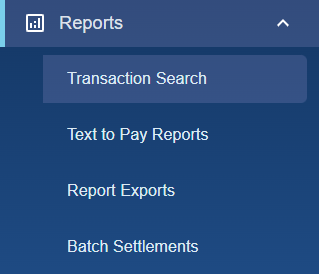
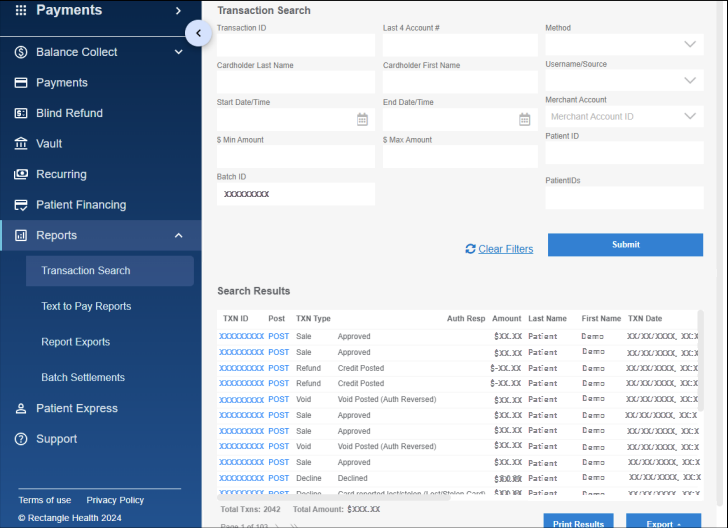
- Click Reports > Transaction Search in the left menu.
- Apply search filters in Transaction Search, and then click Submit.
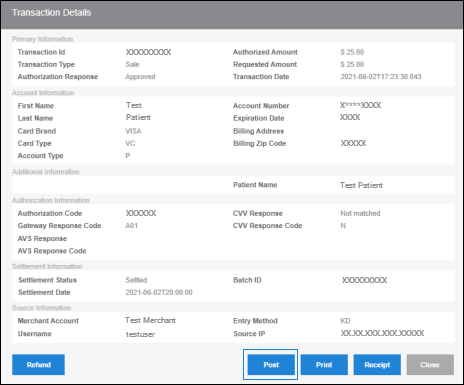
- Locate the transaction in the search results, and then click the Transaction ID link in the TXN ID column.
- Click Refund or Void at the bottom of the Transaction Details screen.
Refund will appear if the transaction has settled.
Void will appear if the transaction has not settled yet.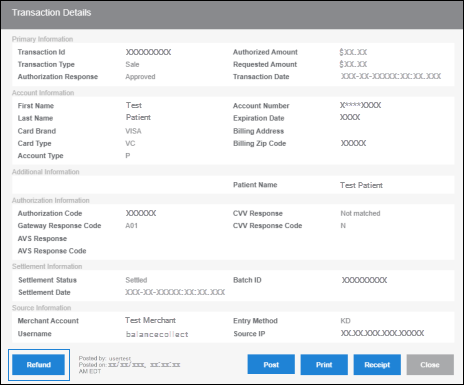
- On Confirm Refund Amount:
To issue a full refund: Leave the full amount.
To issue a partial refund: Enter a lower amount.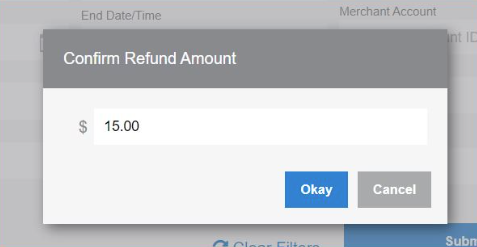
- Click Okay to issue the refund/partial refund (depending on your selection).
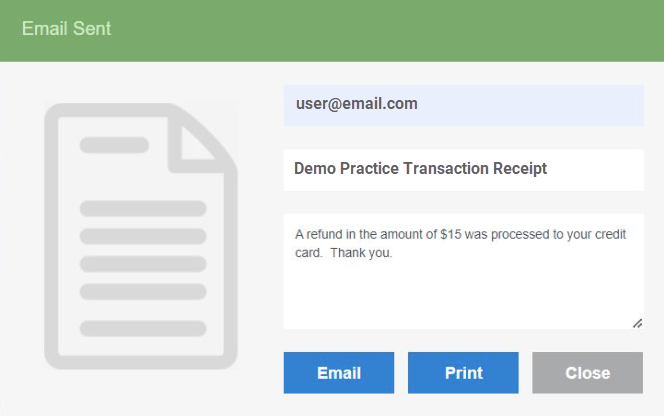
- On the Payment Accepted screen, email or print the refund receipt.
To email the refund receipt: Enter the cardholder's email address and modify the email body to specify that a refund was issued. Click Email to send the email receipt.
To print the refund receipt: Click Print.