
You can send payment requests to multiple patients at once via text message with Bulk Text-to-Pay.
Prerequisites:
- Bulk Text-to-Pay must be enabled for your account.
Interactive Walkthrough
To follow an interactive walkthrough of this process, see How to Use: Bulk Text-to-Pay.
Text Instructions
- Select Balance Collect > Send Payment Requests in the left menu to open the Send Payment Requests - Create Message screen.
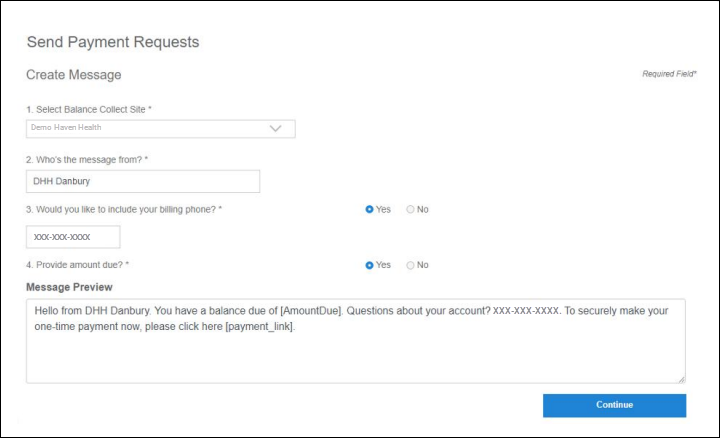
- Choose your Balance Collect site.
If your organization uses more than one Balance Collect site: Select the correct one from the drop-down.
To message patients from different sites: Group recipients by site and send a separate message for each. - Set the “From” location using a location name your patients will recognize.
The Who’s the message from? field automatically fills with the first location associated with the selected Balance Collect site, but you can edit this practice name as needed. - Select Yes or No for Would you like to include your billing phone?
Tip: Including your phone number makes it easier for patients to reach out with questions.
If you select Yes: The billing phone number automatically fills with the number of the first practice associated with the selected Balance Collect site. You can edit the phone number as needed. - Choose Yes or No for Provide amount due?
If you select Yes: The balance will appear in the message and be pre-filled when the patient opens the payment link.
If you select No: The amount due does not appear in the text message, but the patient will still see the amount pre-filled when they open the Balance Collect link. - Review the message in the Message Preview box.
You can only change the location name, phone number, and whether the amount is shown; other parts of the message are not editable. - Click Continue to proceed to the File Upload screen.
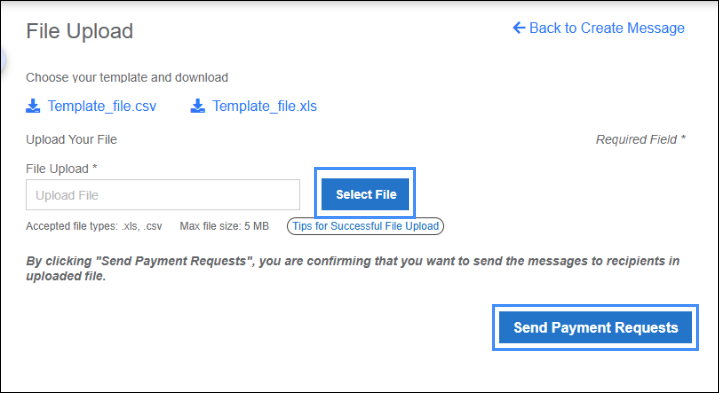
- Choose and download a template to input your recipient information into.
Tip: Using a template ensures you upload all necessary recipient information. - Enter or paste the recipient information into each of the corresponding columns.
The Bulk Text-to-Pay file must follow the rules in About Rules for Successful Bulk Text-to-Pay File Processing to process successfully.
Important template notes:- All fields must be filled out, as any empty or incorrectly formatted fields will cause the upload to fail.
- If a Patient ID doesn’t exist in Patient Express, a new patient record will be created.
- Be careful with Patient IDs, as typos can result in duplicate patient records.
- The columns must be in the specified order for the file to process successfully:
Column A: Patient ID
Column B: Patient Last Name
Column C: Patient First Name
Column D: Cell Phone Number
Column E: Amount Due
- Save the file with a unique name.
- Click Select File and choose the prepared file.
- Select Send Payment Requests to send the Text-to-Pay message to the list of recipients in the file.
What Happens Next
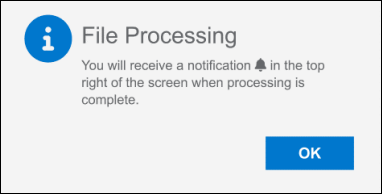
- If the file upload is successful: You will see a File Processing pop-up.
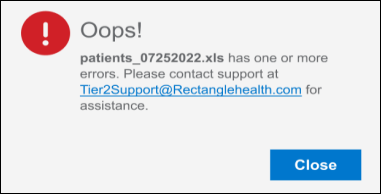
- If the file upload fails: You will see an error message.
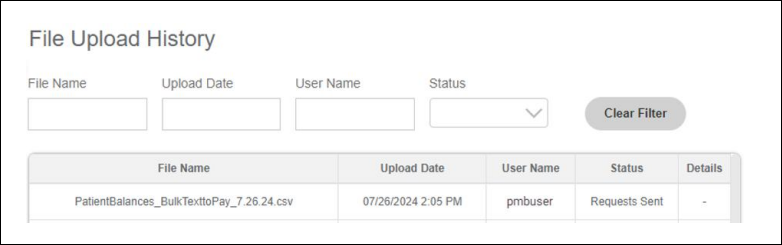
When the file upload begins processing, you are taken to the File Upload History screen (Payment Requests > Upload History), where you can see the status of your Bulk Text-to-Pay file upload. The status options for files are:
- Processing: File is uploading
- Requests Sent: Bulk Text-to-Pay messages were successfully sent
- Failed: Error found in file and no text messages were sent
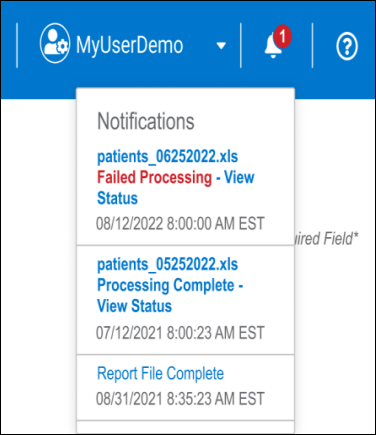
When the file is done processing, a notification appears on the bell icon in the top right corner with more information.
Once the status Requests Sent appears, details about each Text-to-Pay message become available in Text-to-Pay Reports.
Troubleshooting
If a file fails, troubleshoot with an error report by clicking the document icon in the Details column.

Need Help?
If you do not have Bulk Text-to-Pay and would like to add it to your current package, contact your Relationship Manager or contact Customer Care at 800-337-3630 (option 3) or [email protected].